Making the mudag
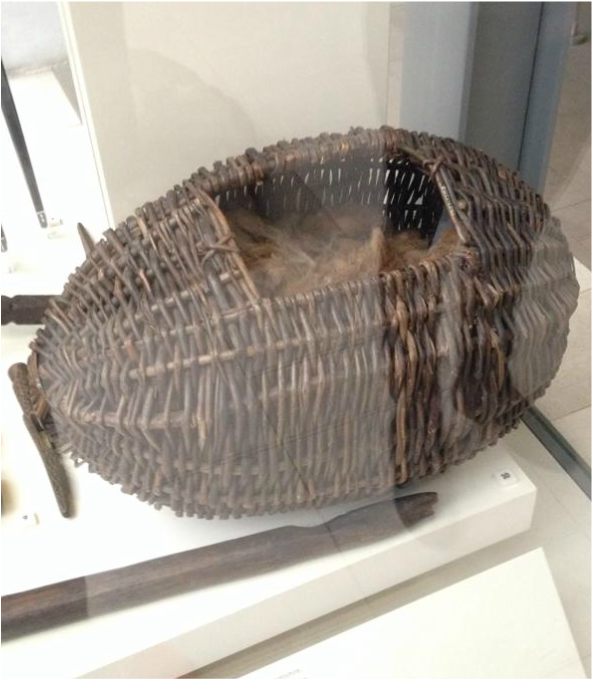
This is the mudag, sometimes called a creelagh or murlagh. The one above is in the Museum of Scotland and was the first one I saw. Since then I have seen and copied others and have learned how to make this unusual basket. I use this name myself as creelagh is used to describe other kinds of basket. In practice I think there was regional and local variation in naming baskets.
It is a basket once made in the Highlands and Islands of Scotland. It was used to hold fleece prior to spinning. The unusual shape meant fleece could be carded into rolags which would be kept safe in the mudag where it could be reached but could not blow away outside or be used as a nest by cat or mouse inside.
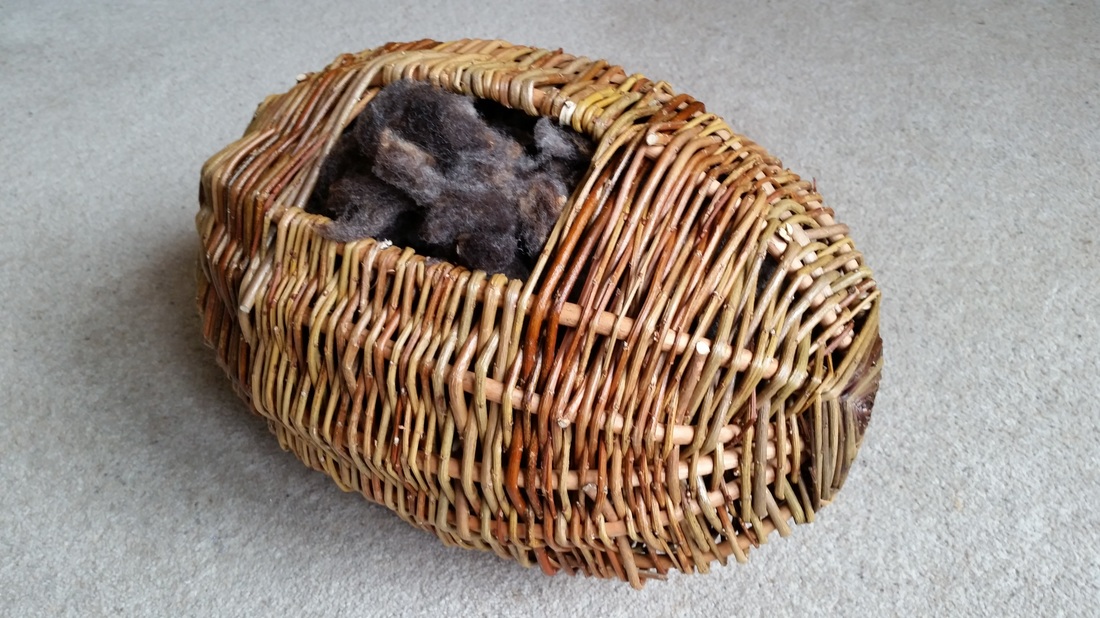
I have been asked to explain how to make this basket by people who could not come to my recent mudag making course. I make the basket of willow but I believe hazel would be used for the frame and ribs if it could be found.
It is a basket once made in the Highlands and Islands of Scotland. It was used to hold fleece prior to spinning. The unusual shape meant fleece could be carded into rolags which would be kept safe in the mudag where it could be reached but could not blow away outside or be used as a nest by cat or mouse inside.
I have been asked to explain how to make this basket by people who could not come to my recent mudag making course. I make the basket of willow but I believe hazel would be used for the frame and ribs if it could be found.
Handy hint: a frame basket is made by hand and eye.
|
|
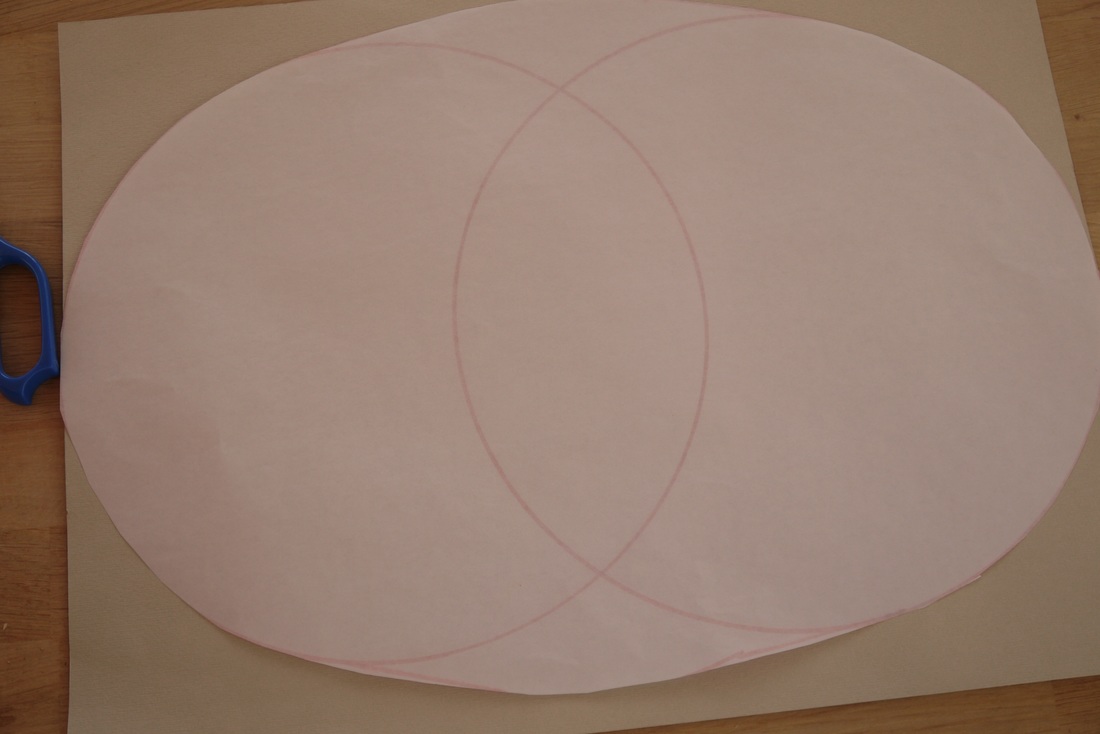
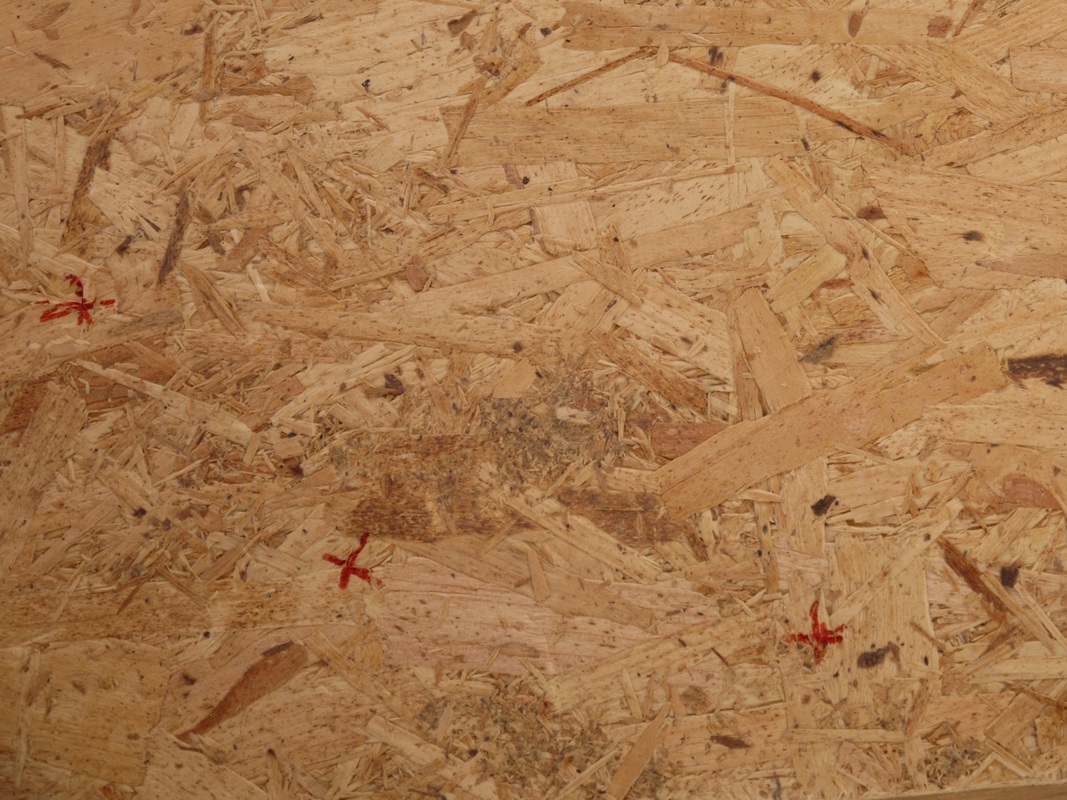
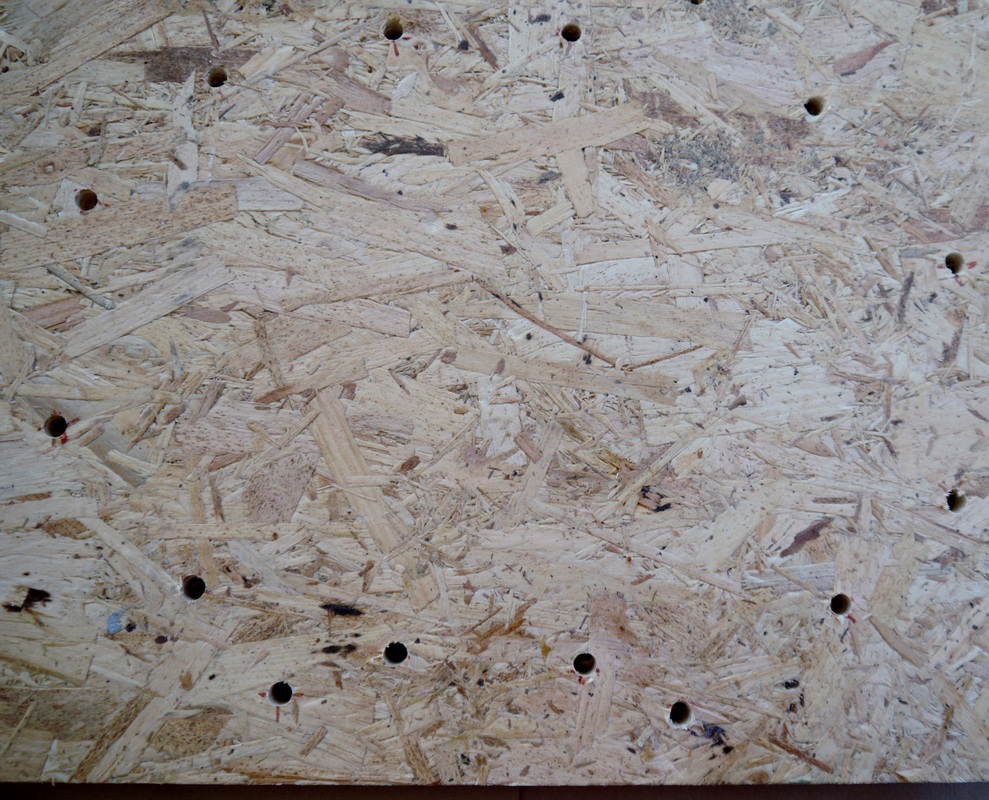
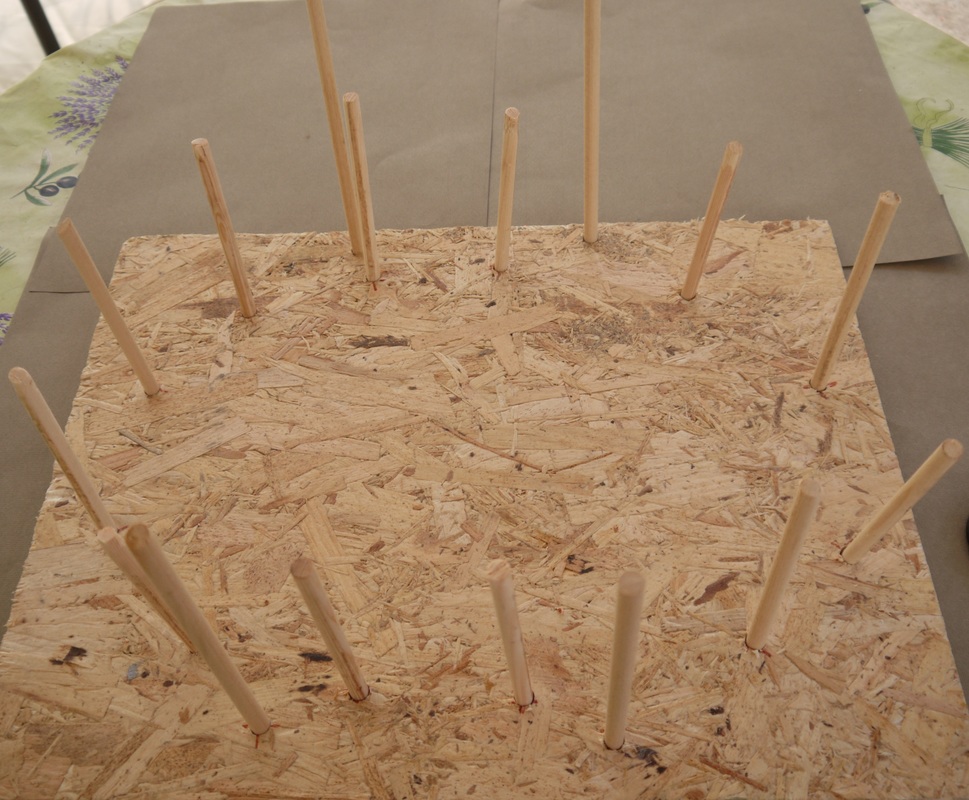
Step 1 Set the framing rods so they dry into the right shape before you start to weave. You will need a peg board for this.
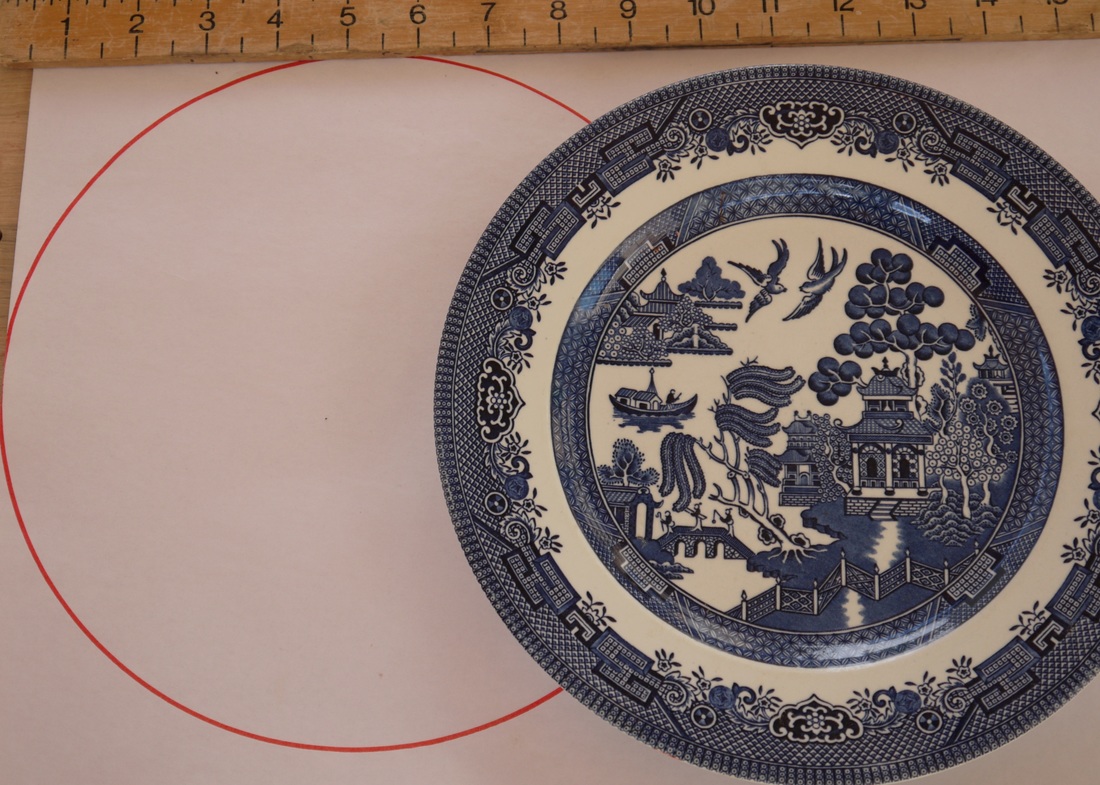
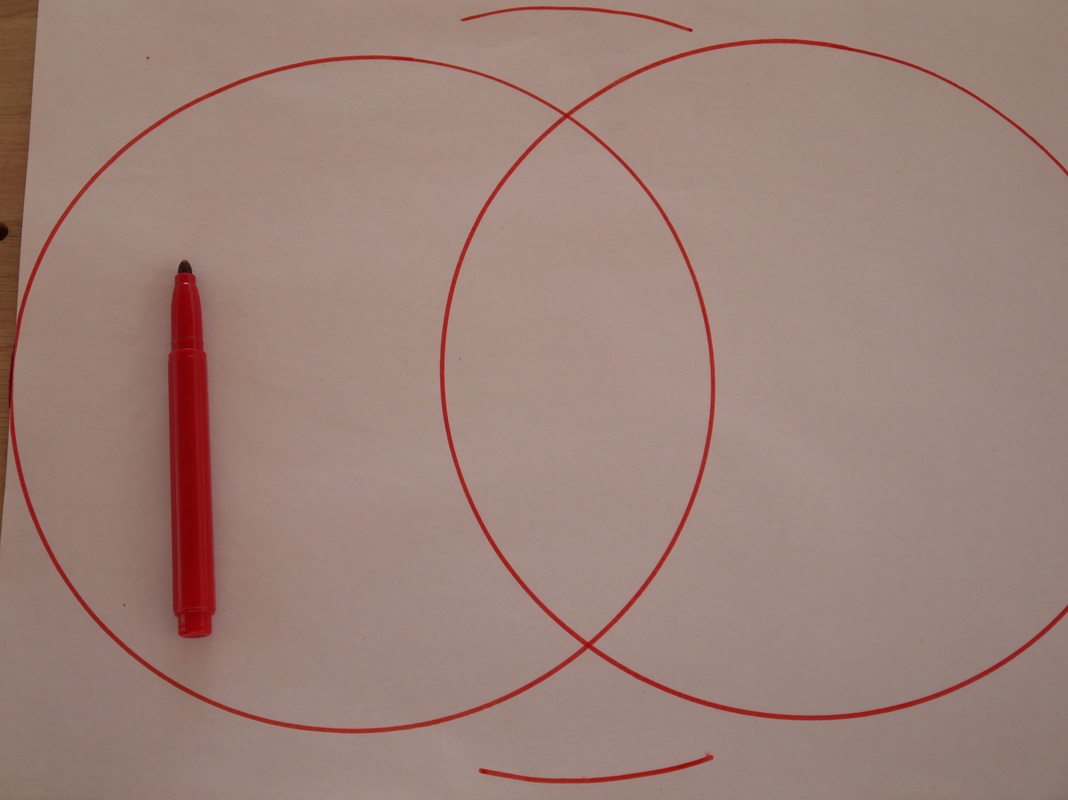
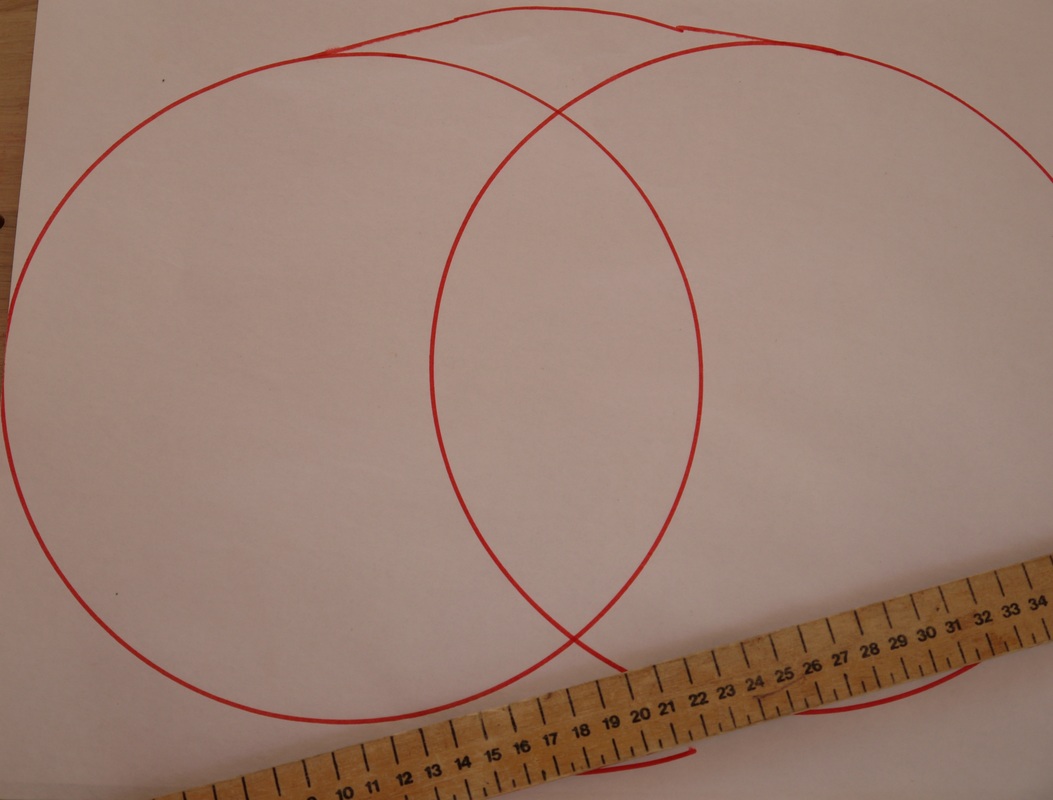
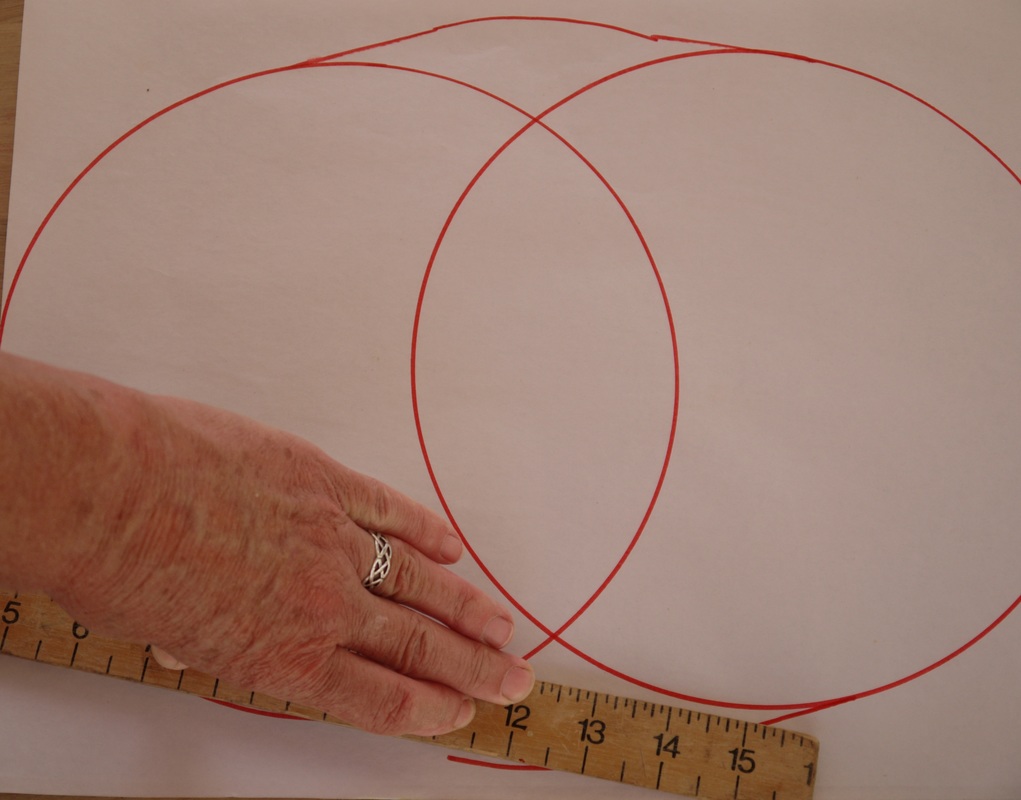
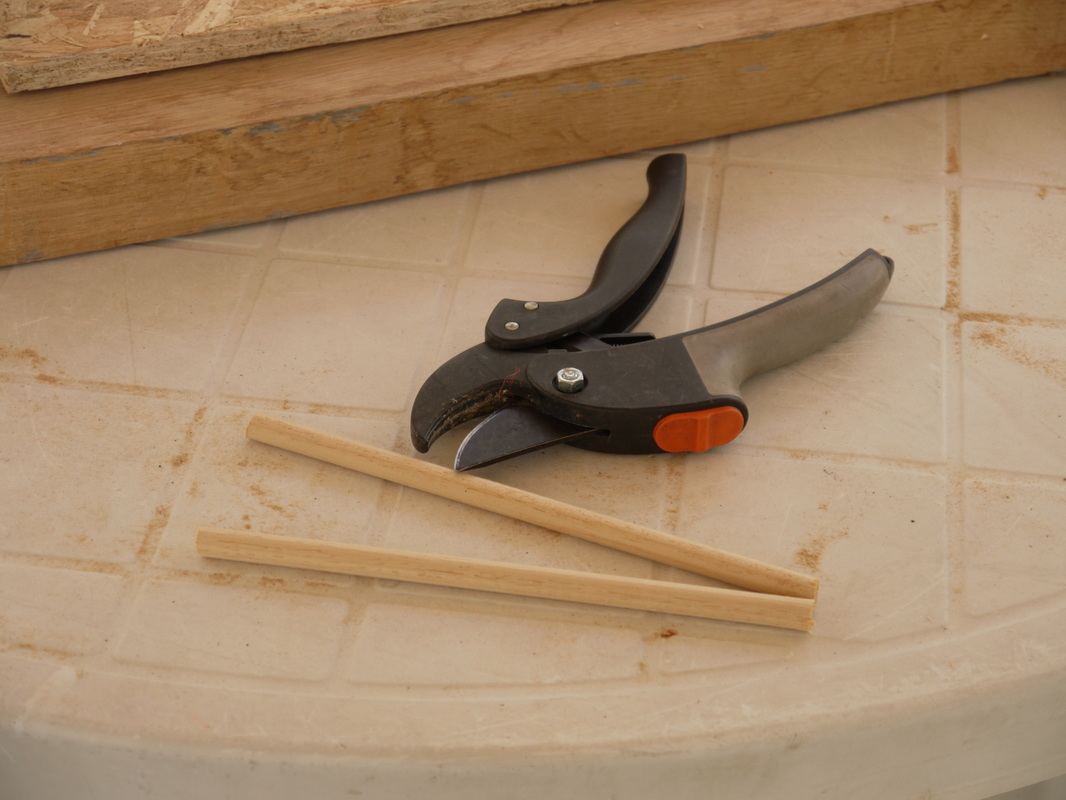
Make the shape by drawing round three dinner plates, two 9 1/2 inch/ 20 cm and one 10 inch/25 cm plate and and joining the lines in between as shown. Cut out the shape. Mark out and drill a series of 3/8 inch/9 mm holes round the shape on a piece of heavy board - kitchen worktop is ideal. Drill a couple of extra holes outside the line to secure the framing rods Cut pegs of 3/8 inch/ 9 mm dowelling and insert into your board. Glue them in place if you are going to use the peg board often. |


Handy hint: use a dry frame and ribs and well soaked and mellowed weavers.
Step 2 Soak several willow rods to make the main frame. I use 2 year old sticks in buff as these are quick to soak and dry but you can use any sturdy rods in white, buff or brown. They must be long enough to go round the former plus at least 6 inches/15cm
|
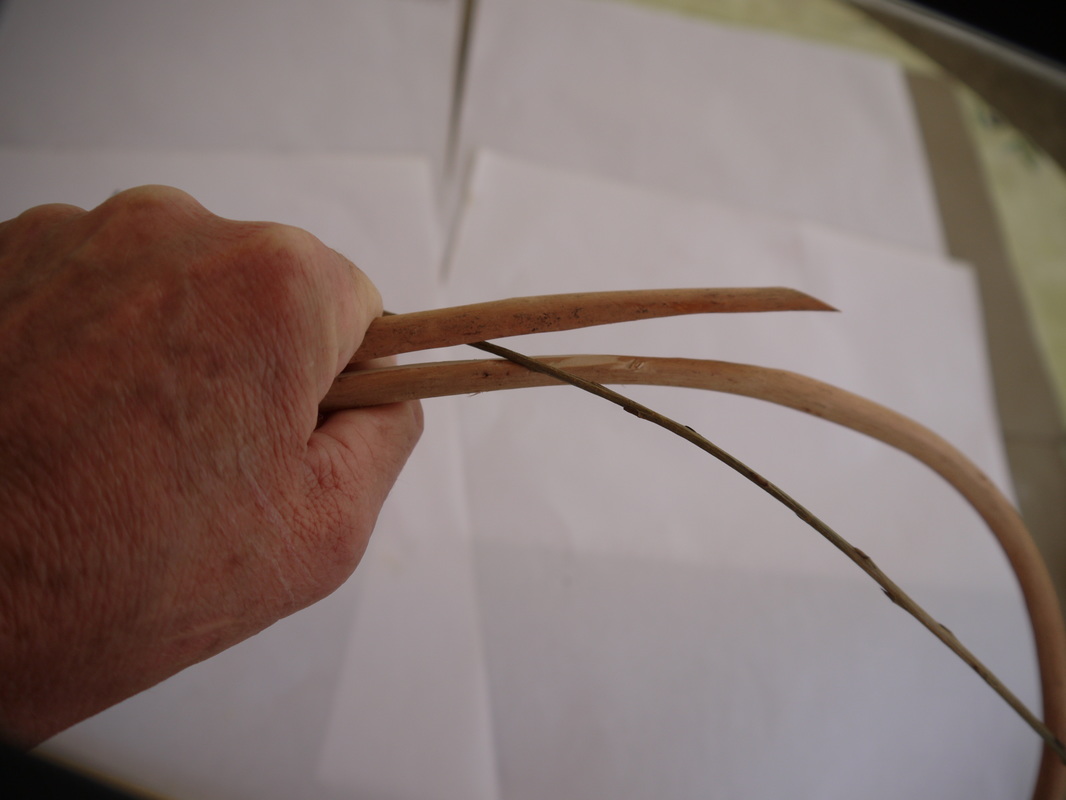
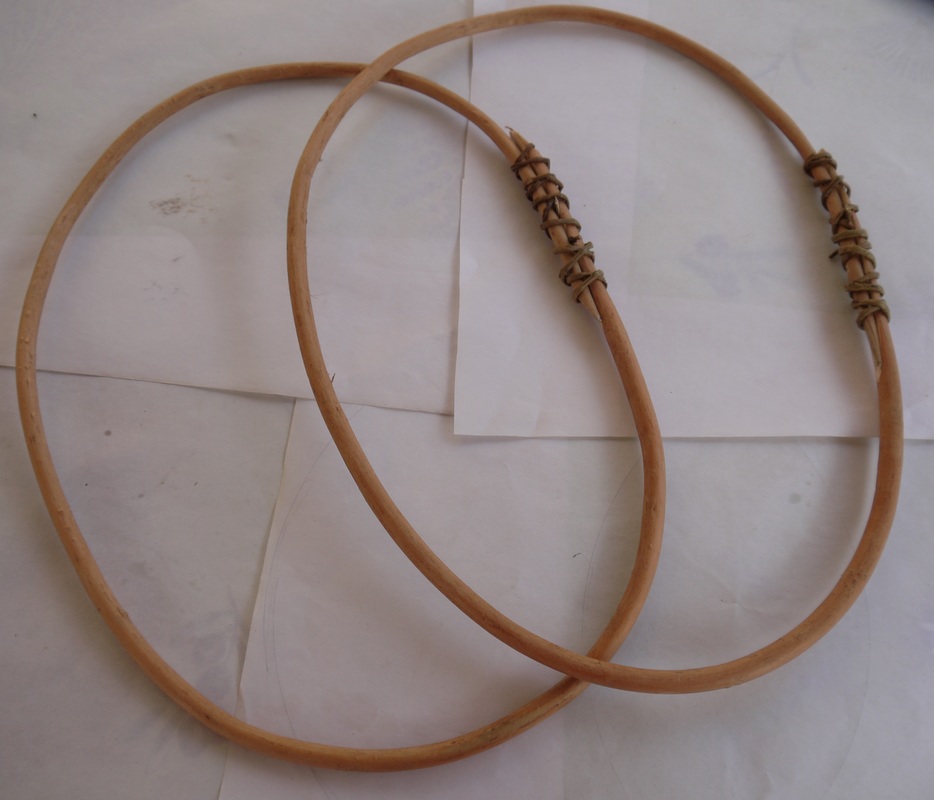
Step 3 Lay two or more (have extra in case they snap) framing rods round the peg board and leave to set with an overlap of at least 6 inches /15 cm with the join on the long side.
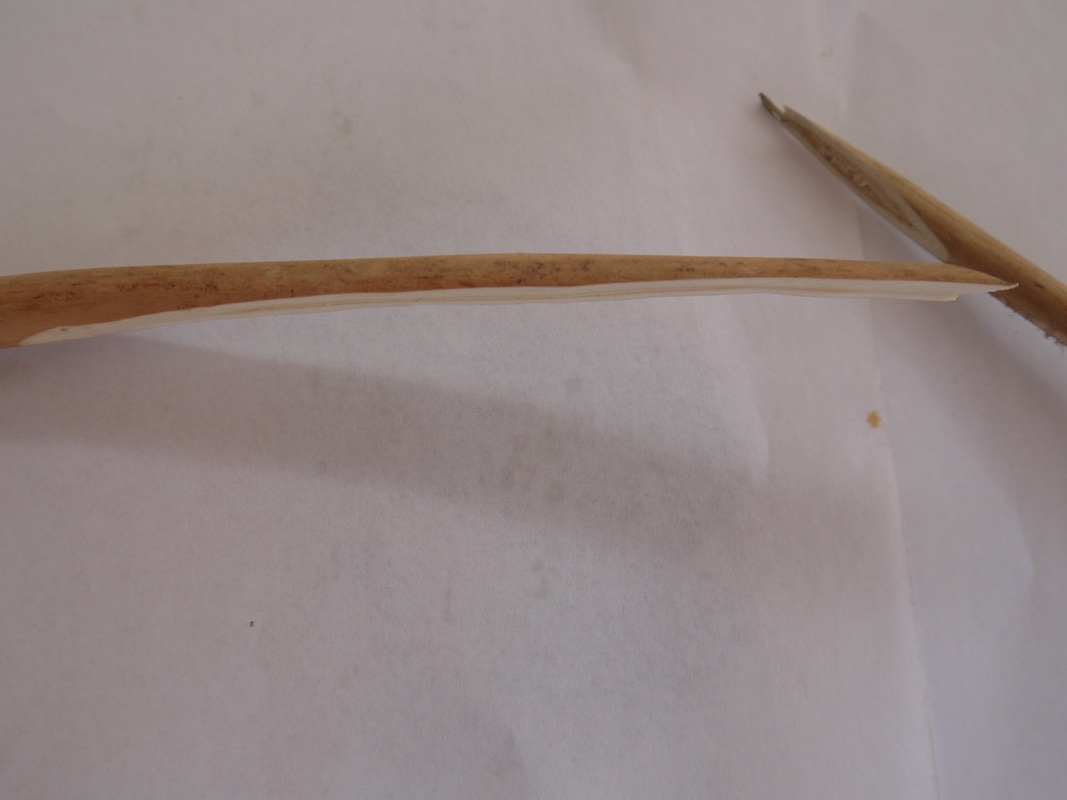
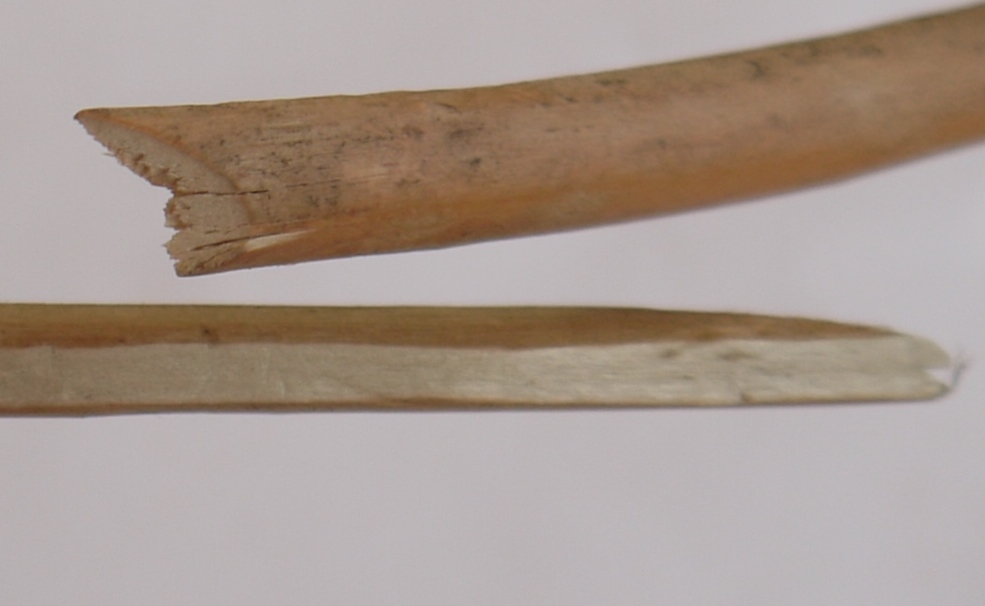
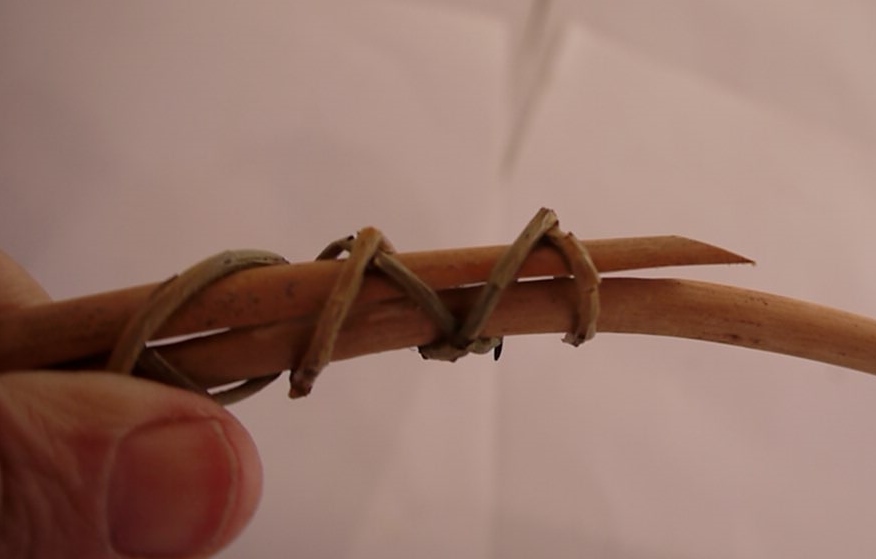
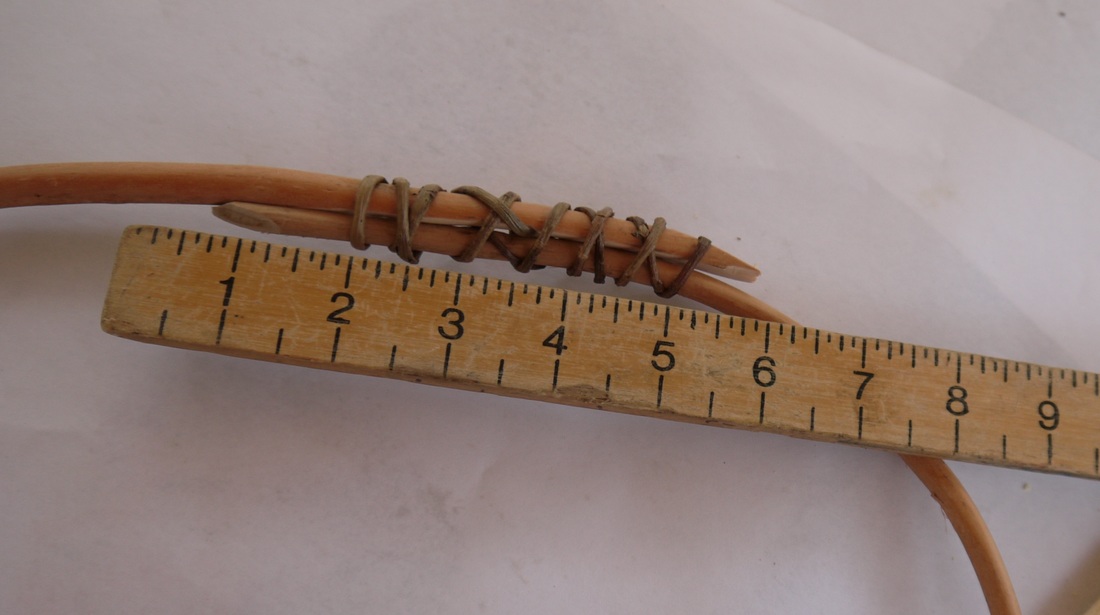
Once they have set pare down the inside of the thicker end as shown Take a sliver off the outside of the thinner end and neaten. Lay them together with the thicker end on the outside. Take a fine rod and lash together tightly starting in the middle with the tip sandwiched between the rods, working to the right and back and then to the left and back, finishing in the middle with the end of the rod pushed through between the rods tightly. Trim. |
|


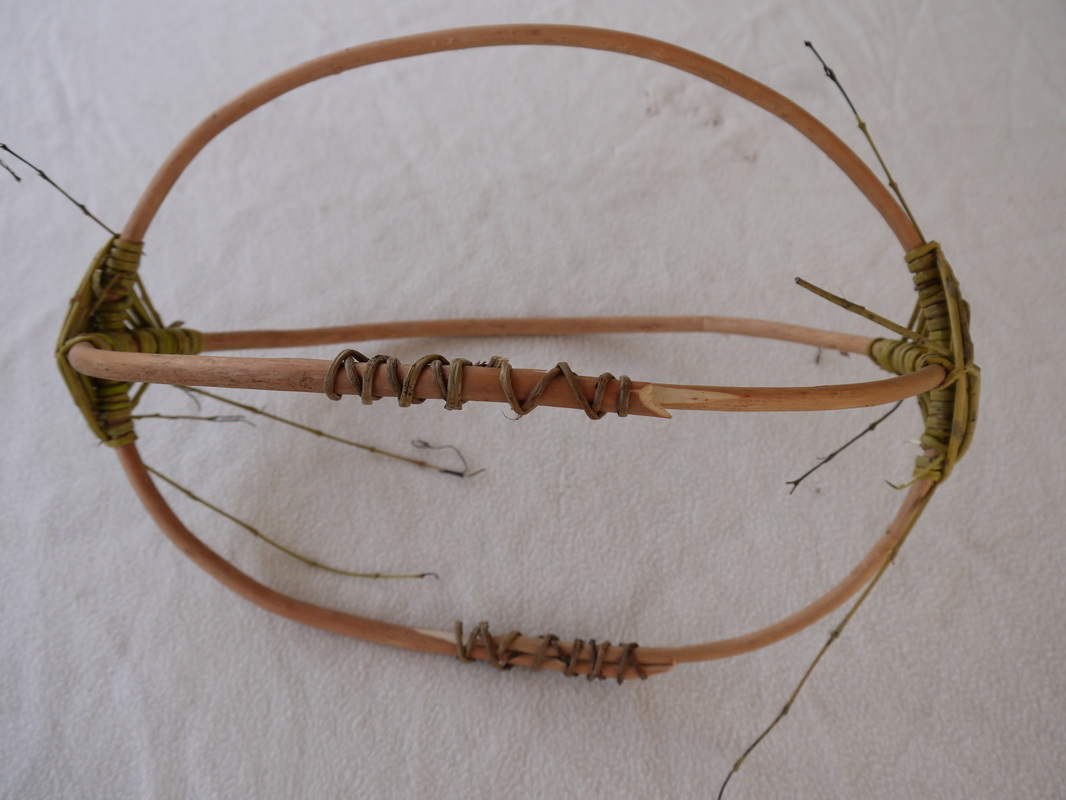
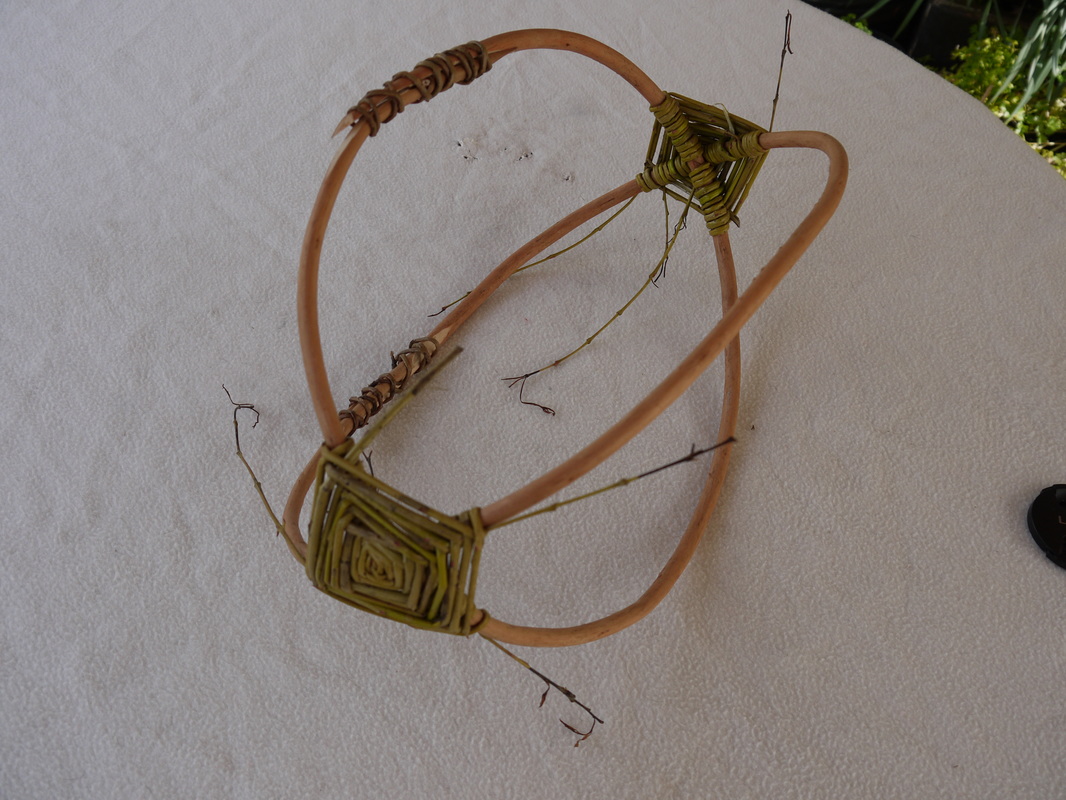
Step 4 Now you are ready to make the mudag. Lash the framing rods together at each end using the God's Eye.
.
.
|
|
Handy hint: practice making the God's Eye before you start over a couple of willow sticks - details elsewhere on this website.
Step 5 Add in one rib in each of the four quarters. Slype at each end and lay into the God's Eye. You want to make a blunt slype so the ends do not poke out through the God's Eye.
Start pairing round a few rods at a time at each end.
Once you find the gap is big enough to put three fingers in it's time to add ribs.
Ribs must be sturdy, dry and of the same thickness as the framing rods. Ease them to the correct shape. If they snap easily you may need to soak them. Shape at both ends with a neat slype.
Set into the God's Eye at both ends. It may take some practice and paring to get the right length. Set two ribs in between three of the gaps and one into the fourth space.
Now you can start randing as you have an uneven number of rods.
Handy hint: always work alternate ends when making a frame basket to keep it even eg four rods at one end, then four rods at the other end. Keep looking at the shape from all directions - small adjustments make a big difference to the outcome.
Step 6 Continue weaving .
Bear in mind you will have to decide where to put the post box and this must be big enough for your hand to reach in easily.
Mark where you are going to put the post box and weave up to this point on both sides.
Bear in mind you will have to decide where to put the post box and this must be big enough for your hand to reach in easily.
Mark where you are going to put the post box and weave up to this point on both sides.
Handy hint; once the basket is coming on well and all the ribs are in place you can finish off the centre first - this means any packing or filling in to one side or the other is not so obvious.
Continue weaving up to the post box - take an extra turn around the edge on every other row. I work from one side to the other at this stage. Pick off inside and out once the willow has dried out.
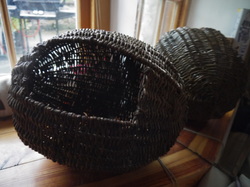
I am thrilled with this mudag which someone has given me - it was probably made in the thirties and is the tubbiest I have seen. I am going to make a replica for her as it is the first one I have seen in such good condition and which I can handle properly. I don't think willow lasts more than 100 years before it starts to perish and there are few willow baskets left which are older. Of course that excludes the precious few which have been preserved in the ground and found in archaeological digs.
